Bonsai Making Tutorial: A Few Simple Steps to Make Your Own Bonsai
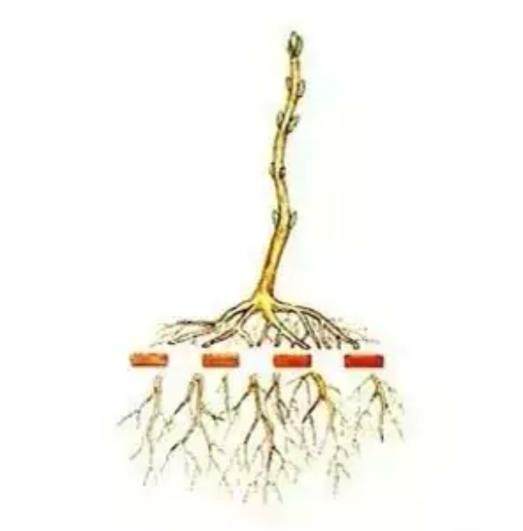
In the early seedling stage, the most important task is root repair. To adapt to a smaller, lighter, less elegant pot, the root system is prepared for the future pot. At the same time, root repair also promotes the formation of more fibrous roots and lateral roots, which lays the foundation for the future roots of the root base.
Besides fixing the roots, another main task is to dwarf the trunk. Trees in nature often extend upward due to their apical position. Bonsai is a miniature of nature. We must dwarf the remaining parts of the bonsai. A short trunk is conducive to the sprouting of branches, and the branches are closer to the base of the trunk, providing more support for the future shape. The dashed line in the picture above is a possible branching point after the shortcut.
After shortening, the new shoots should be further delayed to reduce the number of buds. At the same time, the roots should be pruned regularly to smooth out the fine roots.
After pruning, the buds will sprout. At this point, we need to set the branches and remove unnecessary bud positions. After the branches are completed, not only is the thickening of the lateral branches increased, but the main chain is also increased.
You should want to whip it before the first level is fully lignified. Lignification will increase the difficulty and risk of cutting the branches.
After the main stem and the first branch are crushed, the basic framework of the bonsai is formed. This is the stage for artistic creation. You can use your discoveries to incorporate your ideas into the design of the bonsai. In the design, we should value the triangle and the spicy feeling in bonsai art.