Growing small gourds in pots on the balcony takes some know-how; one plant can bear dozens of them, and a single hand can hold ten.
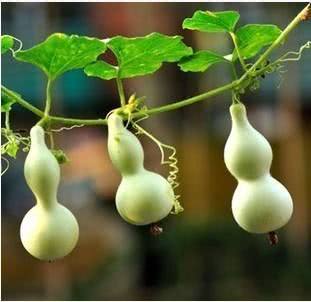
Hand-rubbed gourds, also known as hand-pinched gourds, are loved by many for their exquisite, delicate beauty and small, cute size. Right now, the temperature is just right, so plant one on your own balcony - green vines wind and twine along the balcony, and among the green leaves and white flowers the gourd brothers peek in and out of view, looking especially beautiful! Just one plant can bear quite a few.
In fact, whether it is the hand-rubbed gourd, the Ya gourd, the Jiuxian gourd, the extra-large gourd and so on, the growing methods are all much the same.
So, if you grow them yourself in a flower pot, what aspects do you need to pay attention to? Let's take a look together:
1. Choosing seeds
When choosing seeds, pay attention: be sure to pick plump ones, and avoid shriveled or deformed ones - even if they sprout, the seedlings may not necessarily be healthy.
Then soak them in water and put them in a container, cover them with a damp small cotton cloth, and in three to five days the seeds will sprout. Of course, gourd seedlings can also be bought now. However, if you have seeds, it is still recommended to grow them yourself - the amount used is small, and it is very convenient.
2. Sowing
When planting, pay attention: choose a deeper container, because its root system is especially well developed and the vines are also large, so you need to ensure it gets enough nutrients.
The potting soil should be loose and breathable; ideally put a layer of soil, then a layer of fertilizer, and spread a layer of insect-preventing medicine at the bottom of the pot. Fertilizer and medicine can be bought at a flower shop. The soil requirements are not high - garden soil or leaf mold will do, plus a little vermiculite and perlite to increase breathability.
After mixing, spread it evenly into the flower pot, then water a little - not too much, just slightly damp. Then place the seeds, preferably with the sprouting point facing up, and cover the seeds with a layer of soil.
3. Selecting seedlings
When the seedlings have grown a bit, about 10 cm or so, you can select seedlings. Remove the weak ones and keep the two with the most vigorous growth - only two can be kept in one flower pot, otherwise it is not good for the later nutrient supply. If the small gourds do not get enough nutrients, they will not grow to look good.
One thing to note: when selecting seedlings, there is no need to be reluctant to part with them - being unable to bear small losses ruins the bigger plan.
4. Management
When managing, pay attention: gourds like plenty of water, so during the young stage and the growing stage they must not lack water, otherwise the plant will not grow large and the gourds will bear fewer.
Give as much light as possible; when the light is sufficient, it will grow quickly. At the same time, apply some fertilizer, which helps produce more flower bud differentiation later, so there will be more small gourds. If the potting soil already contains fertilizer, then just adjust appropriately on your own.
5. Pinching the top
When the small gourd grows to 50 to 100 cm, pinch off the tender bud at the very top. When pinching, pinch a slightly larger bit at the top - if you only remove a tiny thread, it will not work and it will keep growing. After pinching the top, it will differentiate into several branches and vines; just keep two and remove the others.
After each vine grows to 40 or 50 cm, pinch the top again, letting each vine differentiate into two more vines, and then there is no need to pinch the tops anymore - otherwise it will differentiate like crazy!
Because it is grown in a flower pot, you should decide the number of vines appropriately according to the size of your own space. This number cannot be generalized; it depends on your own situation.
6. Pollination
Because it is grown on an indoor balcony, after it blooms there are no bees or small insects to pollinate it, so you have to do it yourself.
Note: identify the female and male flowers clearly! At the base of the female flower, where it connects to the vine, you will faintly see a small gourd, tiny and new - when you see it, you will be especially excited! The male flower does not have this at its base, only a slender flower stalk.
When the male flower opens, promptly use a cotton swab to pick up some pollen, then gently touch it to the stigma of the female flower; you can also directly pinch off the male flower and join it to the female flower. This intimate contact is essential! Otherwise the small gourd will not grow.
With enough water and fertilizer, sufficient light, and enough space for the vines to climb, just sit back and wait to harvest the small gourds. If grown well, one plant can bear several dozen, and it also beautifies your balcony - very nice.
Holding several in one hand at once - isn't that quite interesting?