Detailed Explanation of the Ring-Barking Root-Replacement Method for Stump Bonsai
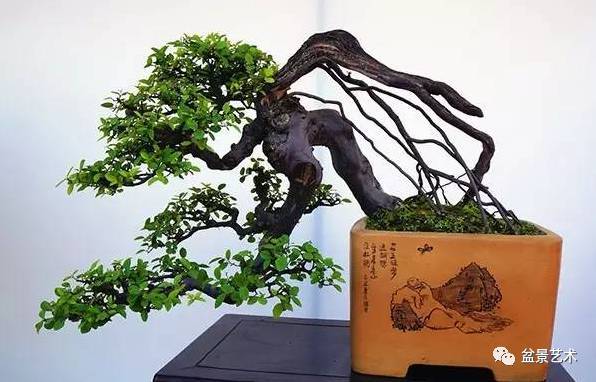
The ring-barking root-replacement method applies the ring-barking air-layering technique commonly used in asexual propagation of flowering plants to encourage a stump in need of renovation to send out secondary roots at a suitable position on the trunk. After a period of cultivation, the plant's original root system, together with the defective parts, is cut away entirely, thereby achieving renewal. It is a new technique advocated in recent years among stump bonsai root-training methods, and it is also a commonly used root-training technique. The measures are introduced as follows.
I. Timing and Conditions for Ring-Barking The ring-barking root-replacement method requires that the plant be in a healthy growing state, and the operation is carried out before new buds break in spring (generally in mid-February).
II. Required Tools and Materials A hand saw, a grafting knife, a narrow chisel, a hand hammer, wire pliers, a piece of iron wire mesh, a length of copper (or aluminum) wire 4MM in diameter, and an appropriate amount of mountain soil and sand.
III. Surgical Steps of Ring-Barking Root Replacement
1) Observe the whole plant, choose a suitable position for root replacement, and mark it;
2) Using a hand saw, grafting knife and narrow chisel, carve a ring groove 4mm wide and 3mm deep at the root-replacement position (it does not necessarily have to be completely ring-barked); the cut surface should be kept as smooth as possible;
3) Embed the copper or aluminum wire into the ring-barking groove, and tap it with a hand hammer so that it fits closely against the trunk; this makes it easier to induce new roots;
4) Cut the iron wire mesh to an appropriate size and form it into a cylinder with a diameter 3-5 times that of the trunk; bury the lower end in the pot (if necessary, secure it through the drainage hole at the bottom of the pot), and make sure the upper plane extends more than 3cm above the ring-barking plane. First place a layer of coarse sand at the bottom of the cylinder, then fill in a mixed soil of mountain soil and sand, vibrate it slightly and water it, and finally fill the soil up to about 3cm above the ring-barking plane;
5) Place the bonsai in a site with ample sunlight and slight shade for maintenance. Keep the stump under conditions of 15-25°C and 70-90% humidity as much as possible. Starting from June, rotate the pot 180° every half month so that the plant roots evenly (note that the bonsai must not be placed in a completely shaded spot, otherwise rooting will be affected);
6) In August, the surface soil can be scraped aside to observe the rooting situation, and the orientation of the bonsai should be adjusted frequently to further encourage new roots. Starting from mid-to-late September, remove the surface soil in several batches to expose the new roots above the soil surface and encourage them to mature and become compacted. At this time the new roots are growing vigorously, and white root tips can be seen through the iron wire mesh. Because the iron wire mesh restricts the further development of strong roots, it also promotes the development and production of weak roots, lateral roots and more new roots. Note that maintenance should continue as usual in winter, and some heat-preservation and antifreeze measures may be taken as appropriate;
7) In February of the following year, untie the iron wire mesh, remove the soil and copper wire, and prune the evenly grown root system by category; cut most roots to 5cm long; cut roots that are too vigorous to about 3cm; fine, weak roots need not be cut. At the same time, widen the original ring-barking groove downward by 2cm and deepen it by about 1cm, tie copper wire again around the upper part inside the groove to further reduce the old roots' nutrient supply to the plant, so as to encourage root development, then re-wrap the iron wire mesh and add mountain soil;
8) By February of the third year, when the fibrous roots sent out from the previously shortened new roots have grown to the iron wire mesh, the bonsai can be lifted from the pot, the trunk cut off from the rootless part below the copper wire, the copper wire removed, and the plant potted in a clay pot for careful maintenance;
9) One month after potting, dilute fertilizer may be applied. After several more years of careful cultivation, when the new roots have grown thick and can initially be exposed above the soil and stones, the root-replacement operation is basically complete.
The above steps and requirements can be flexibly varied and adjusted according to the tree species and the thickness of the trunk. The rooted residual stump cut off during root replacement can also continue to be cultivated after appropriate treatment (for example, as a split-stump bonsai).
IV. Advantages of the Ring-Barking Root-Replacement Method
1) The trunk and roots of the plant are the main source of the artistic beauty of stump bonsai; during long-term cultivation, this method can prevent the trunk and exposed roots from being damaged for various reasons;
2) Some small defects of the plant when young may become obvious over time, to the point of affecting the ornamental effect of the bonsai. After adopting this method, the main physiological defects of bonsai plants can be reduced, such as one-sided roots (commonly known as chicken claws, referring to bonsai exposed roots that develop toward one side), high waist (referring to the trunk portion being too long and losing interest), thin base (commonly known as small feet, referring to the root collar of the plant being clearly thinner than the upper trunk, the most common and most frequently seen defect in grafting), and flat trunk, etc.