The melons and fruits that are indispensable in summer, plant a few pots on the balcony now and you won't worry about having enough to eat
The days pass as if in a single unbroken rush, and before I knew it, it was already mid-May. As the temperature keeps rising, summer's footsteps draw nearer and nearer. As the saying goes: "Eat sprouts in spring, melons in summer, fruits in autumn, roots in winter." In this hot summer, melons and fruits go even better with summer! Bitter melon, watermelon and cucumber in particular all have effects such as clearing heat, reducing internal heat, replenishing water and nourishing the complexion, making them excellent summer melons and fruits. Out of love for these melons and fruits, many friends even grow bitter melon, watermelon and cucumber in pots on their balconies; plant a few pots and you won't be able to finish eating them all summer. So how should these melons and fruits be grown in pots? Below, let me introduce their potting methods. Friends who are interested, plant a few pots quickly!
I. Potting method for bitter melon
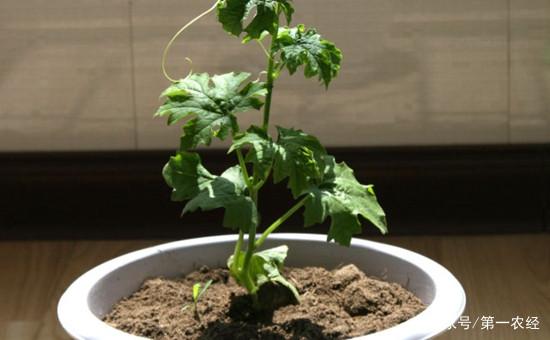
Bitter melon grown in pots on the balcony can be sown directly or raised as seedlings and then transplanted. Bitter melon seeds have a fairly thick seed coat and do not absorb water easily. To increase the germination rate and reduce disease, the seeds can be treated before sowing. Using hot water to scald the seeds and soaking them to speed up germination can promote water absorption and sprouting. For raising seedlings, you can use disposable paper cups or plastic cups, first poking several holes in the bottom. This article was first published on the Fanmimi blog; please cite the source when reposting. Sow the seeds by dibbling them onto finely crumbled nutrient soil, cover with 1-2cm of soil, and water thoroughly with a fine-holed watering can, keeping them warm and moist. For the specific method of raising seedlings in disposable cups, you can see this article on the Fanmimi blog: the method of using disposable cups to raise seedlings. With direct sowing, seedlings emerge in 4-5 days; soaking the seeds to speed up germination will be even faster. Once the seeds grow to 1-2 true leaves, they can be transplanted and set in place. Simply tip the disposable cup out together with the soil and seedling; raising seedlings in disposable cups makes transplanting and setting in place very easy, and is very well suited to growing vegetables on a home balcony. After transplanting, the container for growing bitter melon can be a terracotta or plastic flowerpot, or a foam box. A diameter of preferably more than 30cm and a depth of more than 30cm is best; a certain depth helps the bitter melon root system spread out. No matter what container is used, there must be small drainage holes in the bottom. The surface of the growing medium should be about 2cm below the rim of the container. Use a garden trowel to dig a small hole in the middle of the container, slightly larger than the seedling-raising paper cup. After removing the seedling from the seedling cup, immediately place it into the small hole in the growing medium in the cultivation container, fill in around it with growing medium, and gently firm the growing medium around the seedling with both hands. Water thoroughly right after planting, until water seeps out of the holes in the pot. Each container within 30cm in diameter can hold 1 bitter melon plant.
When the bitter melon plant grown in a pot on the balcony reaches about 30cm in height, begin training the vine. A support should be set up, or string can be used to train it to a sturdy support; be careful not to let the vines tangle with each other. For the vegetable-growing friends on the Fanmimi blog, the balcony vegetable-growing trellis can be a simple A-shaped support; if you have a balcony window guard, you can set the support onto the window guard, but it is best for the climbing vines not to climb onto a metal window guard, to avoid the vines being scorched by the high temperature. Throughout the growth period, promptly pinch off the terminal buds, male flowers and tendrils, leaving only the melons and leaves, so that nutrients are supplied to the growth of the melons in a more concentrated way. In the middle and later stages of growth, be careful to remove old leaves, diseased leaves and excess weak side vines, to facilitate ventilation and light penetration. Artificial pollination during the flowering period can increase the fruit-setting rate, generally carried out from 8 to 10 in the morning; use a cotton swab to apply the pollen from a mature male flower onto the stigma of a female flower. Friends who want to save trouble do not need to pollinate artificially and it will still set fruit, just fewer. Bitter melon has a long growth period; generally apply 1 dose of decomposed organic fertilizer every 1-2 weeks, such as chicken manure fertilizer and the like; if growing it for your own consumption, do not use chemical fertilizers. When the lumpy protrusions on the melon skin protrude and swell, and the color has not yet turned white and shiny, it can be harvested. If saving seeds, you can pick it after the melon skin turns orange-red. What you grow yourself may not be as large as what you buy in the market, because those outside are grown with chemical fertilizers and pesticides, but yours is green and healthy; when it is about right, pick it, do not let it get old.
II. Potting method for watermelon
Watermelon has a well-developed root system. To satisfy root growth, it needs sufficient nutrients, and the basic source of nutrients is the growing medium, which requires a sufficiently large container. Generally about 30cm in diameter and about 50cm tall. In addition, for drainage, the bottom of the container needs small holes that can let water flow out. The growing medium needs to be loose, airy and nutrient-rich; generally choose a mix of soil free of bacterial contamination, plus peat soil, plus organic fertilizer. You can choose seeds of small watermelons (such as Black Beauty, Yellow Little Jade, etc.). If you use seeds left over from eating watermelon, the melons that grow may not look like the original ones, because today's watermelons are all hybrid varieties. Large watermelons are very difficult to grow into their proper form on a balcony. Before sowing, soak the seeds in water for 3-4 hours, then sow them into soil that has been watered thoroughly, and cover with dry soil (do not water immediately after covering with soil, otherwise the soil will cake and the seedlings will have a hard time emerging).
After the seedlings emerge, water according to normal management, and note that there should not be too much water, to prevent root rot. Of course, fertilizing is indispensable; it is recommended to use commercially available compound fertilizer, which is relatively good, and you can also usually water with some rice-washing water (which needs to be fermented). When the melon seedlings have grown a bit, straighten out the vines, orienting them in one direction, or use a bamboo pole or string to pull them up, letting the tendrils coil around the bamboo pole or string, so that the melon seedlings can grow upward. Watermelon flowers come in two kinds, female flowers and male flowers. The ones with a small melon below are female flowers. After the watermelon flowers open, use the stamens of a male flower that opened the same day to smear onto the pistil of a female flower that opened the same day, letting the pollen of the male flower scatter onto the stigma of the female flower; this is assisted pollination. This point is very important: when growing melons on a balcony, without pollination they cannot set fruit. When the watermelon begins to grow larger, if you have pulled the vines up with a bamboo pole or string, you must hang it with a net bag or prop it up with something, otherwise when the melon grows large the vine will not be able to hold it and will break. When the melon has grown fully and the patterns on the skin begin to become clear, it can be harvested.
III. Potting method for cucumber
To grow cucumber, choose a fairly good container: a flowerpot, wooden tub, foam box, or a professional cultivation box. What matters is that the chosen container has good drainage, with a depth of 40cm being suitable. Choose soil that drains well and is fertile nutrient soil, as this is more conducive to cucumber growth. After choosing the container, soak the seeds. This step is very important, as it can promote seed germination and shorten the growth cycle. Put the seeds in warm water at 50°C and soak for 20 minutes, keeping the water temperature constant and stirring continuously during soaking. After 20 minutes, put the seeds in water at the same temperature as the room and soak for 6-8 hours. Take the seeds out, wrap them in a wet towel, and place them in an environment of 25-28°C to speed up germination. Once more than half of the seeds have sprouted white, they can be sown. Evenly scatter the soaked seeds on the surface of the nutrient soil and cover with 1cm of thin soil. Water immediately after sowing; this is called the settling water. Keep the soil moist for the following 4-5 days.
Cucumber is a vine plant, so a trellis should be set up in time. The posts of the support should be close to the cucumber, but do not damage the cucumber roots, so that the cucumber will climb up along the support by itself. When it grows to about one meter, the terminal bud can be pinched off to promote branching in the cucumber. After some days, you will see small flowers opening on the cucumber seedlings; the ones with a small cucumber are female flowers, and the ones without a small cucumber are male flowers. Cucumbers can generally pollinate themselves, but in places without insects and without wind, artificial pollination is needed. Artificial pollination can also increase yield; you can use a clean brush to pick up the anthers of a male flower and then apply it to a female flower, and pollination is complete. After the cucumber sets fruit, its demand for water and fertilizer increases, and it needs to be fertilized a bit more to supplement nutrients, so that it can bear more small cucumbers. In addition, the amount of water should also be increased, so that the cucumbers can grow quickly, tender and full of water.