Pick a few pothos leaves and bring them home, and before long you'll have a whole big pot full.
Pothos really does turn up everywhere. If you have the time and inclination, you can propagate several more pots, and what I'm introducing below is how to propagate a big pot of pothos in a short time.
Experienced plant lovers have already guessed it's cuttings propagation, because pothos has no flowers or fruit, so naturally it can only be propagated by division, which is simple and efficient.
1. Soil-based division propagation
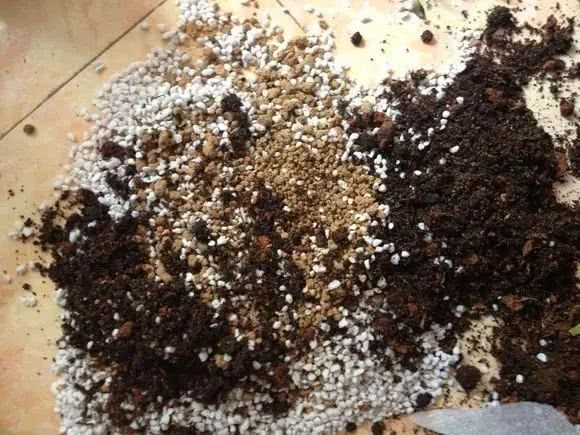
1. Prepare the potting soil
(The white bits are perlite, the black is peat moss, the yellow is akadama soil)
It's best to disinfect it. There are many ways to disinfect: soak in potassium permanganate, sun it, or soak in boiling water for five minutes, and pests and diseases will stay away from then on.
2. Cut the branches
Pothos branches have growth points. What you need to do is cut some robust branches from the pothos, preferably ones with aerial roots. Don't know what aerial roots are? Look at the little roots marked "1" and "2" in the picture below.
3. Insert the cuttings
Each section of branch with one growth point can propagate one plant. Each section should be about 5 cm, and it's best if a growth point has a leaf; it will barely work without a leaf too (just bury the aerial roots slightly into the soil).
4. Insert into the potting soil
Before inserting into the potting soil, you can water the soil a little first, but don't make it too wet; slightly moist is enough. Insert each section of branch diagonally into the potting soil, don't bury the leaves in the soil, and just fill the whole pot with branches. (If you want to propagate a big pot of pothos, you need pothos first; you can also cut some from a plant lover's home.)
5. Care after cutting
After watering the cuttings, move them to a shaded, ventilated environment. A windowsill or a covered shady spot will do. You can mist the leaves with a little water every day, and don't let the potting soil become waterlogged, or all your previous work will be wasted.
6. Wait for sprouting and rooting
(Propagated by the nursery owner themselves)
In less than two weeks, you'll see new little leaves sprouting, and roots starting to form. You only need to keep the potting soil slightly moist; water when it dries out.
7. Notes:
The pot used for cuttings propagation must have drainage holes, and it's best to place broken tiles or small gravel at the bottom of the pot.
After little leaves grow, you can give them a little light; either morning or evening sunlight is fine.
2. Water propagation
1. Cut the branches
Cut a few sections of pothos branches; this is the same as the method above, but since water propagation requires soaking in water, you can cut sections with two growth points, each about 7-10 cm long, and the lower leaves can be removed.
2. Water propagation container
(1 and 2 are their aerial roots respectively; having aerial roots also makes water propagation easier)
Prepare clean water (tap water should sit for 2-3 days, or be sunned for 1 day; rainwater or cooled boiled water also works). Put the prepared branches into the water. It's best to have a divider layer to hold the pothos branches in place and keep the leaves from soaking in the water.
3. Notes on water propagation
The water in water propagation generally needs to be changed once every 3 days, still using clean water. After roots form, there's no need to change the water. Once new leaves grow and the roots are more than 3 cm long, you can transfer it to soil, or you can keep growing it in water the whole time.
4. Do you need nutrient solution?
When you first start water propagation, it's not recommended to add nutrient solution. You need to wait until the roots have grown well before adding it. It's meant to promote growth, and you can't rely on it; just give two drops per week, and don't overdo it.