Glass bottle miniature plant landscape decoration, these plants are the most suitable choices
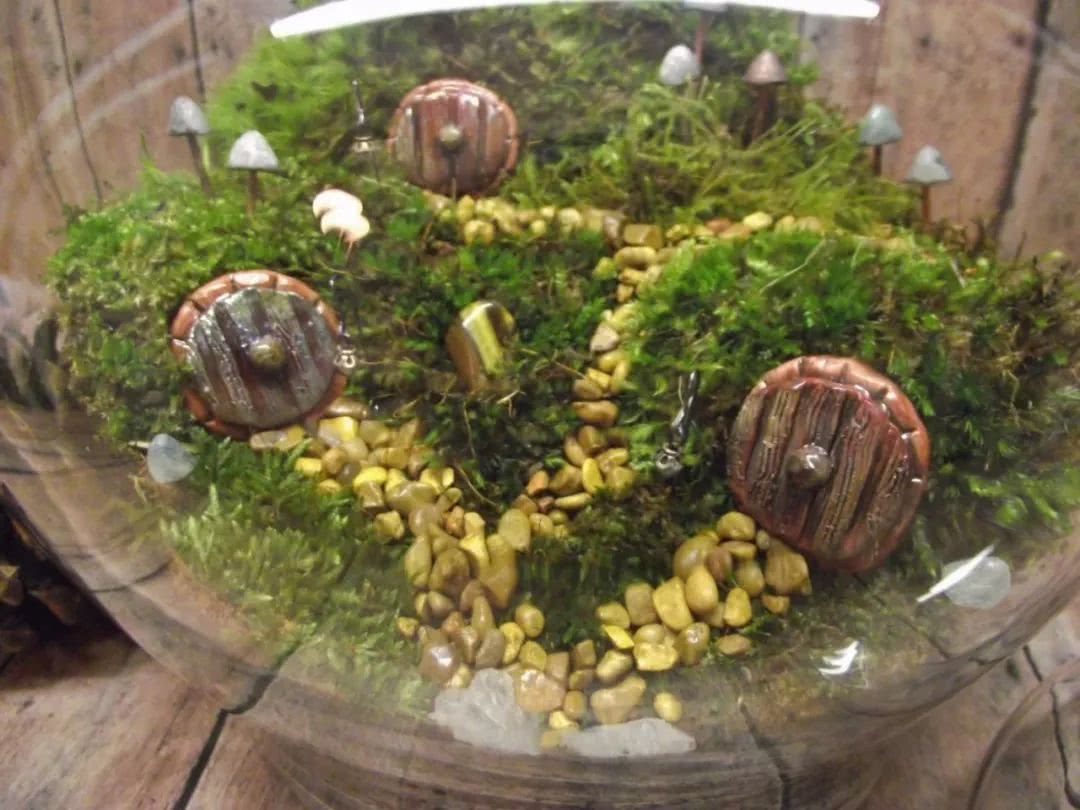
Growing plants inside a glass container looks fresh and bright, and the inside of the cultivation pot is like a miniature ecosystem. It would be even better if they could be self-sufficient. The plants inside the glass bottle can maintain their own growth, and as long as they are maintained properly, they can remain ornamental for a relatively long time.
In a miniature moss plant landscape like the one in the picture above, the plants can also maintain very good growth inside a sealed glass container. Inside it, microorganisms, soil, sunlight and organic matter all remain in a cycling state, and the moisture inside is also relatively sufficient. As time goes by, a water circulation system forms. As long as there is moisture and sunlight, this kind of miniature landscape needs no care.
Below, let us take a look at how these glass bottle miniature landscape plants are made. Of course, there is also an introduction to care methods, the materials that need to be prepared and the points to note when selecting plants. With proper care, these glass bottle landscape plants can be maintained for many years.
Step 1: Choose the environment
Simulating a tropical rainforest or woodland environment is relatively key. You can create a greenhouse environment. Of course, you can also create a desert environment to grow some desert plants. A desert landscape requires an open container, while a closed container is suitable for creating a rainforest environment.
There are many plants to choose from, such as the common Fittonia, Pilea, bromeliads, moss, dwarf palm and ferns, etc. The growing environment should remain warm and humid all year round, with a certain amount of light. The most suitable temperature is between 16 and 30 degrees.
For miniature landscapes like the ones above, choosing just two or three kinds of plants is enough, such as the common brake fern, peat moss and air plants. Keep a warm and humid environment and relatively high air humidity, and a little bit of sunlight every day is enough.
Step 2: Choose the container
There are two types of glass containers to choose from. One is the closed type, a miniature plant landscape that can maintain its own moisture and needs no management, requiring a container with a lid. The common one is an aquarium. Some people even use light bulbs to create miniature plant landscapes.
The other type is a semi-open glass container, which needs regular watering and regular cleaning. This kind of miniature plant landscape is relatively common. You can add some granular stones at the bottom of the pot, then put in soil, and after that you can grow suitable plants.
When selecting plants, choose low-growing plants. As time goes by they will keep growing taller, so choose some plants that are shade-tolerant and tolerant of waterlogging.
Step 3: Choose materials
The following things are all very easy to obtain, and you can also prepare some yourself. They are all very inexpensive materials.
Preparing a suitable glass container is very key. Beginners should of course choose a semi-open transparent glass container.
Prepare some pebbles or other granular stones, and make sure they are completely clean to avoid carrying pathogens. You can wash them completely clean with bleach before using them to grow flowers. Spread the pebbles at the bottom of the pot to about 2 to 3 cm.
Prepare some activated charcoal or bamboo charcoal to separate the soil from the granular stones. It can also be used to clean water and absorb odors, and is very key in a sealed environment.
Prepare some sphagnum moss (peat moss). You can also prepare some moss yourself. It is not only used for decoration, but also can retain moisture. The sphagnum moss does not need to be spread too thickly.
The soil spread in the miniature landscape should not have fertilizer added. The soil chosen is best a humus-rich, pathogen-free humus soil. You can mix peat soil with perlite at a 1:1 ratio, and you can also appropriately add some vermiculite to it to retain moisture. The soil should be at least 4 to 5 cm thick. You can appropriately add large pebbles or stones in the container, which is also quite good for decoration.
Step 4: Choose plants
The plants chosen should be low-growing, suitable for growing in a small space, and able to grow well in a warm and humid environment. Let us take a look at which plants are suitable.
Below I will list some plants suitable for growing in glass containers, such as the bird's nest fern above. Most of them are plants that can grow in semi-water, semi-soil conditions. Most are tropical plants that can grow in aquariums, and with proper light, warmth and moisture they can maintain very good growth.
(The warm and humid-loving sundew has a particularly low demand for fertilizer)
Pilea, Asparagus, bird's nest fern, croton, pothos, ivy, Guzmania, bromeliads, dwarf palm, Acorus gramineus, sundew, pitcher plant, Hypoestes, ornamental Calathea, butterwort, Peperomia watermelon.
The one above is black pearl, a perennial plant with creeping characteristics. Its leaves are small and the plant is low-growing, suitable for growing in glass containers.
If you want to grow some plants with distinctive looks, you can choose brake fern, African violet, button fern, clubmoss, Selaginella and Oxalis.
Step 5: Pre-planning
Before making a glass landscape plant, first select the materials well. It is best to pre-plan the positions of the plants so that the whole landscape looks more natural and fresh.
Step 6: Specific operation
First spread a layer of pebbles 2 to 3 cm thick at the bottom of the container. The pebbles at the bottom act as a drainage layer, preventing water accumulation in the soil and preventing the plant roots from rotting.
Then spread a layer of activated charcoal on top of the pebbles. There is no need to mix the two layers. The black layer in the picture above is activated charcoal.
Then spread a layer of sphagnum moss on top of the activated charcoal. It is used to separate the soil from the activated charcoal. It can also absorb moisture and keep the soil moist. If you find that the sphagnum moss has gone bad, it needs to be replaced. Sphagnum moss counts as a layer of insulating material.
Finally, spread the soil. Use a spoon to add the soil inside and make sure the soil is deep enough, so that the plants have enough space to grow.
During the process of planting the plants, if you find dead leaves, remove them promptly. When planting the plants, you can use chopsticks, tweezers and a spoon. Planting the plants requires special care and caution.
After planting the plants, you can spread some small pebbles, bark and peat moss on top of the soil. Before adding these things, make sure they are clean and clear, and do not introduce pathogens into the container.
After planting the plants, you can appropriately spray water to remove some remaining soil and keep the soil moist, but do not water too much, to avoid water accumulation inside. If you see that even the pebbles at the bottom have water, stop watering.
Step 7: Later care
The care location should be a warm and ventilated place, keeping the temperature between 15 and 30 degrees, maintaining a certain air humidity and avoiding excessive dryness. Keep the soil moist and avoid excessive dryness.
If you find diseased leaves or diseased plants, remove them promptly to avoid excessive humidity inside the glass container. Dead leaves should be removed promptly, otherwise they easily rot.