How do you grow potted orchids? A detailed explanation of the key cultivation techniques
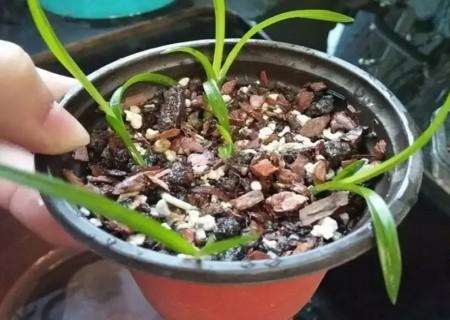
I believe many friends who love flowers and plants will place some potted flowers and plants on their balconies, in their living rooms, and other places to decorate their environment. Different people like to grow different flowers and plants in pots, but no matter what variety of plant is grown in a pot, mastering certain potting techniques is very necessary, as this is very important for the later growth condition and ornamental value of the potted plant.
Some friends like to grow succulents, some like to grow potted fruit trees, and of course there are others who like to grow other plants, but I am rather fond of orchids. Today, based on my own experience with potting and cultivation, I will share with you the cultivation techniques for potted orchids, hoping to give you some inspiration.
1. Preparing the growing medium
When preparing the growing medium for potted orchids, we generally insist on the principle of being loose, breathable, and well-draining. At the same time, to ensure that the potting soil contains a certain amount of nutrients, we can appropriately apply nutrients including trace elements such as nitrogen, phosphorus, and potassium. We should also clear away weeds, small stones, and similar debris from the potting soil, disinfect and sterilize the potting soil, and take measures to eliminate insect eggs. Only the growing medium prepared in this way can be considered high-quality soil.
2. Planting the orchid seedlings
Before potting and planting the orchid seedlings, we should first create a drainage layer at the bottom of the pot to ensure that excess water can filter out through the drainage hole at the bottom when too much is poured; then pour the growing medium into the pot until it is about 1 cm from the rim; finally, plant the orchid seedlings into the growing medium. But note that the depth for planting the orchid seedlings should be appropriate. You can use a tool to poke a hole in the potting soil, insert the orchid seedlings, and then cover them with soil. The planting depth should be such that the potting soil just covers the orchid roots. Throughout the entire process of planting the orchid seedlings, operations should be careful to avoid injuring the orchid seedlings.
3. Watering the orchid seedlings
After planting the orchid seedlings, we need to water them promptly to settle the roots. It is best to water thoroughly until water flows out from the bottom of the pot, ensuring that the soil in the pot is completely moistened and soaked through, but without causing waterlogging. However, if you want the dry growing medium to be completely soaked, you need to wait for the water to fully penetrate the potting soil, so we can water continuously several times; only through repeated watering can the thorough-soaking effect be achieved.
4. Placement and care
After finishing potting and watering, we need to find a suitable location to place the potted plant. Usually, it is recommended to place the potted orchid in a place with sufficient light, often on a windowsill. Pay attention to observing the growth condition of the orchid seedlings in normal times. If you find that the pot is short of water, carry out water replenishment measures in good time. At the same time, you can often spray water on the orchid plant to keep the plant and potting soil moist. But at the same time, avoid direct strong light to prevent sunburn damage to the plant; usually, providing scattered light and soft light is enough.
Finally, what we need to do is often pay attention to the growth process of the orchid plant and quietly wait for it to slowly grow up. Think about it, what an exciting process this is. Through hands-on operation, you can not only enjoy the joy of planting, but also exercise our patience and carefulness. Why not do it? If you also want to have your own beautiful potted plant, hurry up and give it a try!