A Beginner's Guide to Bonsai Shaping: A Detailed Case Study of the Production Process for One Bonsai Tree
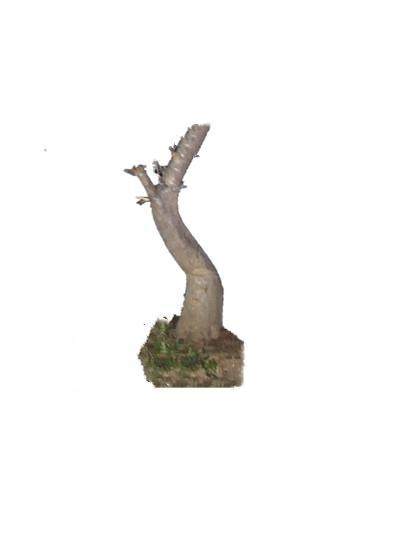
▼This is an elm stump acquired last spring, height: 85 cm, ground-level trunk diameter 23 cm.
▼Chopping the top one year after planting
▲Reviewing the branches of the stump after chopping the top, the situation is as follows:
▲It is easy to see: branch No. 1 will serve as the apex branch in the future; branch No. 2 will be trained into a large cascading branch; branches 3, 4, 5 and 6 will be trained as secondary branches of the bonsai.
▲First, branch No. 1, the apex branch. Among all the branches, apex branch 1 is relatively thin and weak. However, due to apical dominance, if it continues to be left to grow freely, it will quickly thicken in the future. Looking at the entire stump, whether apex branch, cascading branch or secondary branches, all are relatively thin and weak, which is also the reason why the branches on the entire stump material are only wired and not cut. As I introduced in an earlier article, in order to achieve a thickening effect on the branches, the stump material should be left to grow freely. Once the thickness of the primary branches is relatively harmonious with the trunk, then the second and third level branches can be cut back and grown out in stages.
▲Now let's talk about branch No. 2.
First, let's discuss the trunk style of this elm stump: it is a standard "S" shape. In real bonsai production, this kind of "S" shape is a major taboo - too rigid and dead, formulaic, lacking in agility. The entire stump material has no scars or marks, no sinewy character. Of course, the weathered, aged feel of the stump material can be created later; this is not a difficult problem. But designing a large cascading branch on the upper part of the stump can add considerably to the overall appeal of the bonsai, and can also make up for the inherent shortcomings brought by the trunk style.
Therefore, branch 2, as the large cascading branch, should be given key training. For branch 2, only wiring is done; the second and third level branches on it are not thinned or cut. After it has been left to grow freely to a certain thickness, the tip can be cut, and then the third level branches can be cut back and trained. For wiring the cascading branch, spiral wiring is used (in photo 1 above, viewed from the side it forms an up-and-down wave shape. In photo 2, viewed from above, it forms a left-and-right curve) to avoid wiring it into a wave shape or a large bow shape.
Next, let's talk about secondary branches 3, 4, 5 and 6.
Secondary branches 3, 4, 5 and 6 are all staggered in their positions on the trunk, and there should be no situation where one is directly above another, that is, so-called parallel branches. For the wiring of secondary branches, the only requirement is that the direction of the branch lines conforms to the shaping requirements; other things are not dealt with for now, and will be decided later according to how things develop: if later, due to apical dominance, branches 1 and 2 reach the required thickness, then branches 1 and 2 should be wired flat, and the small branches on them should also be thinned and wired flat, to suppress their apical dominance, while the secondary branches are left to grow freely. If branches 1 and 2 are not thick enough, while the lower secondary branches reach the requirements, then the lower secondary branches should be cut back short, generally to a length of 3-5 cm. Here, one can also apply Teacher Wang Hengliang's shaping technique of "cap the top with a single branch, make a scene with a single branch." That is, "treat each branch on the stump as an independent bonsai to be shaped," and then achieve overall unity and harmony.
Note that for fast-growing tree species such as elms, growth is fast and branches also set their shape quickly. Therefore, when the elm leaves have fully opened, the wire should be removed in good time, so as to avoid leaving very heavy artificial traces, which is also not conducive to the healthy growth of the bonsai.
What is shown above is only using this stump as an example to sort out the points to note in bonsai shaping, playing a role of drawing inferences from one instance. Stump materials differ, trunk styles differ, and only within the scope of general shaping rules should one work according to the material and the style. Therefore, in bonsai shaping, one must still put the accumulation of one's own experience first.
Thank you for reading, and welcome to follow the editor's Baijiahao account "Boyuan Self-Media"