Detailed guide to making a forest-style bonsai, teaching you bonsai making step by step
Forest-style bonsai works are loved by many friends; they are like miniature forests and very distinctive. There are many ways to make a forest-style bonsai. Today I will share with you a simple method for making a forest-style bonsai. Let's learn together.
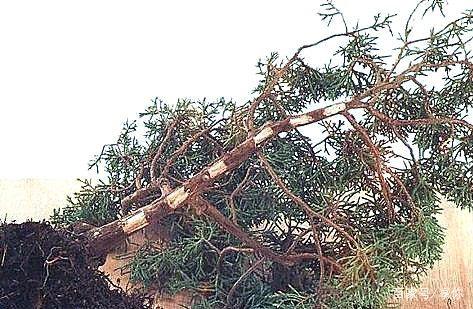
Step 1: Choose a tree stump you like, and use a knife to cut an incision on one side of the main trunk as shown in the picture (Step 1). The main purpose is to make it grow roots. The size and number of incisions are determined by the tree stump you choose.
Step 2: Trim off excess branches and leaves, and prepare to pot it. Face the cut area downward, and use iron wire to secure and tie it tightly.
Step 3: After potting, cover the tree stump with alkaline soil, and tie the iron wire tightly around the tree stump so that it will not lean this way and that. At present, it is still difficult for the incisions to grow roots and absorb water, so the main root system still needs to be handled well. In order to allow the incisions to grow roots quickly, you can also add some rooting powder or nutrient solution.
Step 4: In this way, a pot of forest-style bonsai is completed. Step 4 shows the later formed work, for bonsai enthusiasts' reference only. Let's try this method together!
The above was compiled and edited by "Xiang Ni". If you like it, remember to follow, comment, save, and share.