A tiny elm stump transforms into a palm-sized miniature bonsai in a few steps
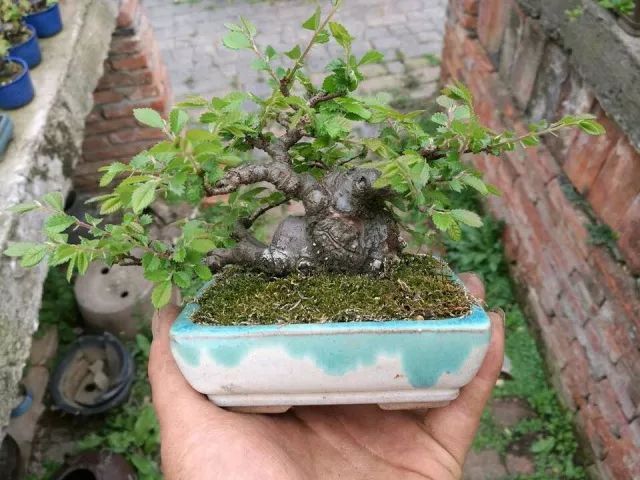
Don't doubt it: a little elm sapling, once potted, will make your eyes light up. After a few more rounds of observation and shaping, ta-da, it can truly reinvent itself beyond recognition, so much so that even its parents wouldn't recognize it.
And you, fellow gardener, only need to keep this secret guide to making a miniature bonsai close at hand.
How to make a miniature elm bonsai
Part One
The little elm you see here underwent a tree-form makeover in the second half of last year. At that time, the editor thought about growing it on a bit more, then using it to create a "semi-cascade style" elm bonsai.
Do you think this elm sapling has that potential?
At the time, although the ratio between the spread of the foliage clump and the thickness of the trunk was quite ideal, unfortunately the trunk was too long.
So the editor scraped away the bark at about 1/3 of the way up the trunk from the base, and in principle the bark removed did not exceed 2/3 of the trunk's circumference. Then wet mud mixed with a little rooting powder was smeared around the wound, and it was planted in a small clay pot, in hopes that new roots would sprout from the wound area later on.
Part Two
Now it is spring, and when the little elm was taken out of the clay pot, it was found that new roots had already grown from the wound where the bark had been scraped off.
Without hesitation, the trunk was cut short.
Part Three
After the trunk was cut, careful observation showed that the number of new roots was acceptable, so there was no need to return it to the clay pot for further care; it could be potted directly, done in one step.
Part Four
Choose a hexagonal tall cylindrical pot, cut a small piece of coir mesh, and lay it over the drainage hole in the bottom of the pot to prevent soil from washing away when watering.
Editor's tip: because miniature pots are small, tiles and gravel are not suitable, so we chose coir mesh. Of course, coir mesh can also be replaced with pine needles or moss, which work well too.
Part Five
After potting, mounding soil and settling the plant, immediately use the immersion method to let the potted tree absorb enough water (generally 3 to 5 minutes).
Then place the bonsai in a ventilated shady spot; after half a month of care it can be moved into the sunlight and switched to routine management.
Once the sapling regains its vigor, you can start admiring it in the palm of your hand.
Of course, we still need to keep thinking about how to wire and shape it next, so that this miniature elm bonsai develops along the lines of our original vision, the "semi-cascade style" bonsai.
Haha, the revolution is not yet successful, so fellow gardeners, keep up the effort; let's advance and retreat together and master the art of growing on the balcony.