Give your flowers artificial respiration, and the leaves will be as green as emerald, with no root rot even after 20 years of growing
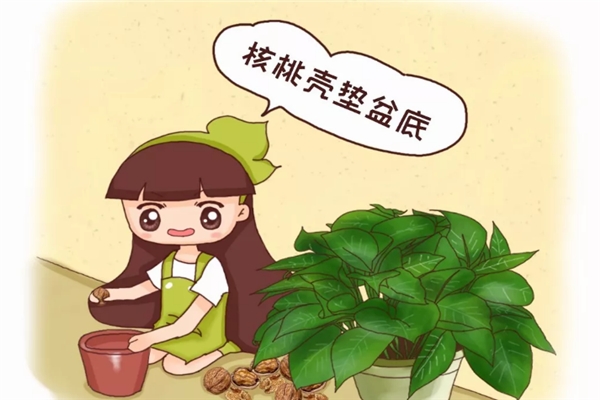
Line the bottom of the pot with walnut shells, and the leaves will grow plump, green, and fast!
After Huahua eats the walnut kernels, she never has the heart to throw away the walnut shells and keeps them all like treasures. They are a natural wonder material for lining the bottom of pots, with strong air permeability and drainage, allowing flower roots to breathe smoothly and grow thick and strong. Why worry that the flowers will not grow well?
1. Collect walnut shells
Collect the walnut shells. Flower lovers can use a hammer to smash the walnut shells; just breaking them to about the size shown in the picture below is enough.
2. Lay 1 piece of window screen mesh on the bottom of the pot
First place a piece of window screen mesh over the drainage hole. This can prevent soil from leaking out and also stop insects from crawling into the soil.
3. Spread the walnut shells on the bottom of the pot
Spread the crushed walnut shells on the bottom of the pot, about 5 cm thick. If most of the walnut shells are relatively complete half-shells, you do not have to crush them. To prevent water from collecting inside the shells, just place them with the opening facing down on the bottom of the pot.
4. Add soil
Then spread loose, fertile soil, such as a mix of pine needle soil and sand, over the walnut shells until the flower pot is filled.
5. Plant the flowers in the pot
Walnut shells are relatively hard and not easy to rot, and they can improve the soil's water permeability and air permeability for a long time. They are very suitable for growing plants such as pothos and clivia. Flower lovers no longer have to fear root rot!
Line the bottom of the pot with broken bricks and tiles, and the roots will grow so strong they burst the pot!
Broken bricks and tiles have many gaps, so do not underestimate their water and air permeability. Spread broken bricks and tiles on the bottom of the pot, let the flower roots breathe fresh air, and you will never have to worry about suffocating and rotting the roots again!
1. Pick up broken bricks and tiles
Broken bricks and tiles are fairly common in garbage piles or on construction sites. Flower lovers can go pick some up, but be careful not to cut your hands.
2. Break the broken bricks and tiles into pieces
For large pieces of brick and tile, flower lovers can smash them with a hammer. There is no need to smash them too small; breaking them into small pieces about the size of a thumb is enough.
3. Wash the broken bricks and tiles and soak them in a carbendazim solution
First rinse the soil and dirt off the broken bricks and tiles with clean water, then put them into a carbendazim solution and soak for 1-2 hours. This is to kill pathogens and prevent the flowers from getting sick.
4. Let the broken bricks and tiles dry
After soaking for 1-2 hours, take out the broken bricks and tiles and spread them flat on clean ground to dry, preferably in a ventilated, sunny place.
5. Line the bottom of the pot with broken bricks and tiles, then add soil
First lay 1 old stocking over the drainage hole, then spread the dried broken bricks and tiles on the old stocking, about 3-5 cm thick. Then sprinkle a layer of coarse gravel to fill the gaps between the brick and tile pieces, and finally add soil!
6. Plant the flowers
Lining the bottom of the pot with broken bricks and tiles is very suitable for growing flowers with larger forms and well-developed root systems, such as Radermachera sinica and Pachira aquatica, making the roots grow stronger and stronger and the leaves as green as emerald!
Line the bottom of the pot with eggshells, and the leaves will be dense, oily green, and so thick they block the wind!
Eggs are really too common, and eggshells are a great treasure for growing flowers. As a flower grower, how could you throw them away? Spread them on the bottom of the pot, and they will not only let excess water drain out quickly and avoid root rot, but also slowly release elements such as nitrogen and phosphorus, making the flower leaves shine so green they dazzle the eyes!
1. Wash the eggshells
Rinse the eggshells with clean water and wash away the residual egg liquid on the inner walls to prevent attracting insects over time.
2. Dry the eggshells in the sun and crush them
Spread the washed eggshells flat and put them in a ventilated, sunny place. After they dry in the sun, crush them, but do not crush them too finely.
3. Place the eggshells on the bottom of the pot
First find a piece of non-woven fabric, such as the white non-woven bag that comes with new shoes, and place it over the drainage hole of the flower pot. Then spread the dried eggshells on the bottom of the pot, about 4-6 cm thick.
4. Add loose, breathable nutrient soil
Spread loose, breathable soil, such as a mix of leaf mold and sand, over the eggshells until the flower pot is filled.
5. Plant the flowers
Flower lovers can now plant the flowers. Whether growing Christmas cactus or spider plant, they are guaranteed to grow like crazy, and you absolutely will not have to fear yellow leaves or root rot!
Insert 1 straw into the pot, and the roots will breathe smoothly right away!
In some cities where flower lovers live, the temperature is still relatively low, so it is not yet possible to repot. But the soil is visibly compacted, and when you water it, the water cannot even seep down. The flowers have yellow leaves and go soft. What can be done? Just 1 straw will do the trick, letting the flower roots instantly breathe fresh air and immediately perk up!
1. Prepare a few thick straws and coarse river sand
Flower lovers should prepare a few straws, not too thin, and try to find thick ones. At the same time, get some river sand with relatively large particles.
2. Poke holes around the edge of the pot and insert the straws
First use 1 of the straws to insert into the soil at the edge of the pot, pushing it down to the bottom of the pot, then pull it out from the hole, insert it in another spot, and do this in 4-6 places in total. Finally, insert the remaining straws into the holes respectively.
3. Pour coarse sand through the straws into the holes
Pour the coarse sand in through the straw openings. Stop once it is about level with the potting soil, then pull out the straws, and the coarse sand will remain in the soil, forming individual sand columns.
4. Water the sand columns, and the flowers will immediately perk up energetically
Pour water onto the sand columns. In this way, the water can slowly seep into the soil through the sand columns, and it can also improve the air permeability of the potting soil, letting the flower roots immediately breathe fresh air, allowing the flowers to slowly recover and become lush, green, and upright again!
The "artificial respiration" method,
have flower lovers learned it?
Do not let your flowers suffocate to death in the soil for nothing!
If you think Huahua's method is useful,
then quickly share it with your friends and let them take a look!