Christmas cactus grown into a 2-meter flowering tree, moss rose grown into an old bonsai-like stump, all thanks to this one trick
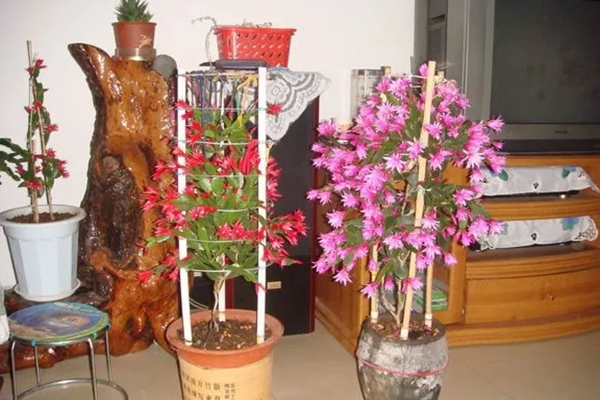
Graft a Christmas cactus, and it blooms into a waterfall of flowers!
Many people grow Christmas cactus at home, but its root system is rather weak, and with too much water in summer it easily suffers root rot, plus its nutrient absorption is somewhat poor. If you graft it, all these problems are solved! You can do it as long as the temperature is above 15°C!
How do you graft a Christmas cactus?
1. Prepare a small knife, and sterilize the blade with a lighter and alcohol, so the graft wound is less likely to get infected or rot.
2. There are many rootstock options for grafting Christmas cactus, such as dragon fruit, three-ribbed cactus (Hylocereus undatus), prickly pear cactus, senita cactus (Pachycereus marginatus), Pereskia, and so on. Each grower can choose according to their own situation.
3. This time Pereskia is chosen as the rootstock, since grafting onto Pereskia adapts quickly and is tolerant of both waterlogging and drought. First remove some of the Pereskia leaves.
4. Use a blade to cut diagonally at the spot where the leaf was removed, making a slit about 1 cm deep.
5. Then choose some robust Christmas cactus leaf segments, cut them into small sections, each section with 2 to 3 leaf segments is enough.
6. Use a small knife to make a diagonal cut at the bottom end, about 1 cm long.
7. Insert the trimmed Christmas cactus leaf segment into the slit in the Pereskia, secure it with a small clip, and remove the clip after 3 days. According to personal preference, you can graft multiple layers or a single layer.
8. Pereskia branches are rather soft, so after grafting remember to use a wooden stick or a flower support to assist growth.
9. After grafting the Christmas cactus, water it less. After 10 to 15 days, if the leaves are emerald green and not wilting, then it has succeeded, and at this point you can water and care for it normally.
Graft moss rose, and it becomes an old stump that can survive the winter!
Moss rose is also called "die-hard", so there's no need for Huahua to explain how easy it is to grow, but have you ever seen an old-stump moss rose? You can achieve it just by grafting, and it can not only overwinter but also live for many years!
How do you graft moss rose?
1. For grafting moss rose, choose perennial moss rose, select one with a fairly well-developed root and stem as the rootstock, and cut off its branches.
2. Choose several moss rose plants with beautiful colors, and cut off branches of different colors.
3. Use a knife to make a diagonal cut at the end of the branch. Since moss rose is quite tough, it can be grafted successfully even without disinfection treatment.
4. Make a cut on the branch used as the rootstock, and insert the moss rose scion into it.
5. Wrap fine string a few times around the joint to secure it, or use a clip with relatively little clamping force.
6. After all are grafted, it looks like the state in the picture below. Moss rose heals quickly, and after a few days you can take off the string.
7. Give it plenty of sun every day, and before long you will harvest a pot of colorful moss rose. With a flower support to assist, it will be neater and the flower shape will look even better!
Graft bougainvillea, and it blooms in five colors!
Bougainvillea has brilliant colors and diverse varieties. If you graft it, the bougainvillea will grow more robustly, and the colors will also be diverse!
How do you graft bougainvillea?
1. For the branch used as the scion, it is best to choose a semi-lignified one, and make a diagonal cut with a sharp small knife.
2. For the rootstock, it is best to choose a purple bougainvillea that has already grown for many years and is fairly thick and strong. Use a knife to trim the rootstock into the shape shown in the picture below.
3. Join the scion and the rootstock; the tighter the fit, the higher the survival rate.
4. Wrap the joint with plastic wrap or film, wrapping all the way to the top of the scion. Put the grafted bougainvillea in a warm place for care, with the temperature preferably above 20°C.
5. After about 10 to 15 days, new buds will break through the film and emerge. After about 20 days you can remove the film.
6. After one month you can resume normal care, and when the flowering season comes, you will have a pot of richly colorful bougainvillea!
Have you learned the grafting methods for these flowers?
If you like, you can try it yourself,
Don't forget to share it with other flower lovers!